Building Your Cadre of Mentors

Building Your Cadre of Mentors

(Today’s post is by Gabby Raymond, one of our new Team Toolkit Trainees!)

Finding a good mentor is like getting a personalized self-help book, one that is full of insightful questions and practical guidance tailored to you. A traditional mentor focuses on guiding your personal growth. However, you can receive a wide array of guidance from a variety of perspectives when you work together with someone, so let’s expand our vocabulary a bit and use the word Collaborators as a more general term.

Just like you wouldn’t need five copies of the same self-help book, it’s useful to have different types of Collaborators, each playing a different role. The alignment chart below illustrates a variety of Collaborators based on the people I have found particularly valuable in my life. The goal of this diagram is to help you identify any gaps in your current cadre and opportunities to round out your group. And the best part, meeting up with one of these Collaborators only costs about as much as a cup of coffee! (usually)

In this chart, the horizontal axis reflects the Collaborator’s relationship to you; your peers are on the left while those with more seniority, formal authority, or clout are on the right. The vertical axis depicts the Collaborator’s perspective on guidance. The guidance you get from people at the top of the vertical axis helps you with personal growth, while the guidance from people at the other end of the axis helps you solve problems or champion solutions.

When I think of a traditional mentor, I think of an Advocator in the upper right quadrant. As someone with clout who can help you grow career-wise, they’ve been in your shoes and can give you advice. Advocators also know other authority figures with whom they can share your accomplishments; they’re the Collaborator who can help you get your next promotion. I find advocating for yourself and having others advocate for you is an important way to gain visibility in your community.

In the upper left side is the Friendtor, a peer who you trust to give more personal advice. They walk the line of friend and mentor, so they know all the best things about you but can also point out your flaws. I personally ask my Friendtors for advice on team dynamics and navigating conversations with my leadership.

An Educator straddles the line in the lower left quadrant. They are someone with specific domain knowledge about the problem you’re trying to solve. An Educator’s role is to teach you skills or information relevant to your work and are the Collaborator you’re most likely to shadow. I’ve found Educators to be closer to a peer than an authority figure, but that’s not always the case.

An Innovator is a Collaborator who is a problem-solving powerhouse, and they span the whole bottom half of the chart. Innovators can either have a background in your problem area or can be someone with a fresh perspective – both mentalities can be incredibly useful depending on your situation. People who embody the mindset of Team Toolkit are my go-to Innovators.

Solidly in the lower right Authority/Champion quadrant is the Accelerator – think of them as someone who will help catapult your idea. They’ve got high-powered connections and stay up to date with the current trends. The strategic prowess of an Accelerator means they are the ones who can help develop and refine your idea. These Collaborators are moving quickly from success to success and can help you do the same.

Finally, at the center of this chart is a person with a wide network, the Connector. They’re the Collaborator who seems to know everyone. Having a Connector introduce you to someone they know personally is often more successful than cold-emailing someone with whom you want to grab a virtual coffee. They can be your gateway to many of the other Collaborators in this chart.

I hope this post has helped you view mentors through a new frame of reference. If you have any questions, feel free to reach out and grab a virtual cup of coffee (or tea!) with me.


Lotus Blossom Tool Tips

Lotus Blossom Tool Tips

The Lotus Blossom ideation tool is one of the most popular in the toolkit, and it’s also one of the simplest. This is a great way to help a team quickly come up with a large quantity of high quality ideas, in a format that is structured, binned, and categorized. A complete Lotus Blossom, with all the petals filled in, can be a really useful artifact for the team to refer to as the work progresses.

But don’t let the simplicity of the tool fool you. There are some subtle nuances and non-obvious applications & implications hidden in this tool, and it can be a challenging one to use well. Let’s take a closer look at some common patterns and missteps.

When a team is filling out a Lotus Blossom I often notice that one blossom has a lot of blank petals while another is fully populated or even overstuffed with more than eight. As a facilitator I like to direct the team’s attention to the blank blossom and encourage them to explore that idea in more depth. Is there a reason we’re not filling that one out? Is it a good reason?

I might also point out that if we’re focusing (and overfilling) on one blossom, that might indicate a high level of interest in that area so it’s worth pursuing, maybe even using it as the core for a whole new Lotus Blossom canvas. Alternatively, all those ideas might indicate a high level of comfort & familiarity with that topic. Maybe we’re only filling it in so completely because it’s easy to do so. If that’s the case, perhaps we should move on and do the more challenging work of exploring less familiar ground. Either course of action is fine – the trick is to be deliberate in our decision to either pursue it or pivot.

Another thing to watch for is the phrase “I have this idea but I’m not sure where to put it in the Lotus Blossom.” Now, the point of this tool is to develop ideas that are connected to each other. If the team is just coming up with random unconnected ideas that genuinely don’t fit into any of the petals or blossoms, they are just brainstorming and not really using the Lotus Blossom tool. In that case, I try to redirect them towards the empty petals and blossoms that do have labels, encouraging them to build on these ideas by getting more specific and granular.

But sometimes the phrase “I’m not sure where to put this” means you’ve come up with an idea that genuinely fits in multiple places. If that’s the case, it’s possible you discovered a relationship between the ideas that is not currently reflected in the Lotus Blossom layout. At this point you may want to rearrange and combine the related ideas into a single blossom. This is easier to do with a digital canvas than it is on paper, of course.

Another strategy for the “not sure where to put it” situation is to label one of the blossoms OTHER and put all the random stuff there. It’s not optimal, but this strategy can serve as a useful parking lot or holding place for ideas that may find a more connected home later.

The Double Diamond

The Double Diamond

The double diamond is a well-known visual map of the design process starting with the challenge at hand and ending with a final solution. The process pairs divergent thinking (where the participants come up with many ideas) with convergent thinking (narrowing the ideas down to the most feasible and practical).

– – –

The Double Diamond is a problem-solving framework that originally began in the design world. It describes four phases of problem solving:

  1. Set the stage
  2. Design the right thing
  3. Design the thing right
  4. Deliver

The first phase is when a problem is acknowledged, and the problem-solving challenge is introduced. Phase 2 and 3 are the active portions of the problem-solving process where the solution is ideated, designed, and created. In the last phase, the solution is delivered to the user.

The diamonds represent the different types of thinking that are needed during the problem-solving process. The left-hand side of each diamond represents Divergent Thinking. This is when teams are encouraged to widen their thinking and generate a broad range of ideas. On this side of the diamond, quantity is more important than quality. Divergent thinking benefits from diversity of thought, so be sure to include new and varied team members who can help everyone think outside of the box.

ITK Tip: Check out the 4 tools in the “Generate Ideas” category of our Toolkit: Lotus Blossom, Mind Mapping, TRIZ Prism, and Bodystorming!

After a certain threshold (based on time or some other factor), the team then moves into the right-hand side of the diamond. This area represents Convergent Thinking, where the team narrows their thinking. Here, they’ll focus on reducing, prioritizing, and eliminating many options into one. The team will often use evaluation criteria to help them remove options.

ITK Tip: Check out the 3 tools in the “Evaluation Options” category of our Toolkit: Rose, Bud, Thorn; Stormdraining; and Prototyping!

You’ll notice that there is a diamond in both Phase 2 and Phase 3. That’s because this cycle of divergent and convergent thinking is an iterative process. Although the diagram doesn’t explicitly show it, you can actually repeat the diamond pattern multiple times within one phase, whether in parallel or in series!

Another thing you’ll notice is the similarity of the labels in Phase 2 and Phase 3. However, they are critically different in meaning: In Phase 2, you design the right thing, whereas in Phase 3, you design the thing right.

The key distinction here is that Phase 2’s priority is to make sure you define the problem well. A clearly articulated problem statement ensures that all teammates are on the same page and that it’s a problem worth solving. If this phase is skipped, team may find themselves creating solutions for symptoms of a problem, rather than the real problem itself.

ITK Tip: Check out the Problem Framing canvas!

Once the team gains consensus on the problem, then the team embarks into Phase 3 where they can begin creating solutions. The team again flows from divergent to convergent thinking until they arrive at a final solution. Especially in Phase 3, it’s very common to have multiple iterations of this diamond cycle.

That’s the double diamond in a nutshell, and let us know in the comments below how your team uses this framework!

Flip The Script: PersNOna

Flip The Script: PersNOna

Persona is a tool we use to describe a semi-fictional ideal customer or user of your product or service. The tool lives under “Understand User” category and serves as a vital way to understand or empathize with their perspective, opinion, or point of view.

Personas help a project team understand their users’ needs, motivations, limitations, and capabilities, acting as a focal point and reminder throughout the project, ensuring the final product is something a human being would actually need or want. Personas accelerate the process of developing and validating solutions, are a useful component of thought-experiments, and help increase the clarity and realism of the project team’s pitches and presentations.

Envisioning a persona can be challenging, especially when starting with a blank sheet of paper. What do they like? What do they do? What are their responsibilities? What are their values? Ideally, you want your personas to be built off existing user research to help answer these questions. But what if you don’t have existing users? Sometimes it’s easier and more impactful to start by outlining an anti-persona – or PersNOna – that you want to target. Identifying what falls out of scope can be just as important as identifying what falls into scope. Using reverse thinking, this exercise clarifies, refines, and builds consensus among your team.

We’re no strangers to reverse thinking or brainstorming here at Innovation Toolkit. If you’re familiar with our Premortem tool, you know that through defining failure, we inversely define success. Sometimes it’s easier to think negatively about all the things that could go wrong and where we may misstep, than what we actually need to do to succeed.

Oftentimes, thinking about the reverse can be freeing and allow ideas to flow more openly than solution-oriented brainstorming, removing the pressure to be “right” and encouraging failure. Once you’ve brainstormed all of the ideas for failure, you reverse them into solutions. Reverse brainstorming is a good technique when it is difficult to identify solutions to the problem directly. It could be used in standard solution brainstorming, too (challenge: fill out a Lotus Blossom with anti-ideas!).

You may want to create a PersNOna for several reasons:

  • You think everyone could be a target user / your persona is too broad
  • You don’t know where to start with a persona
  • You feel strongly about the qualities that would NOT fit your target user/customer
  • You want to work by process of elimination

Sometimes it’s easier to start with the “definitely nots” than the “definitely’s.” That was the case when we were discussing adding new members to Team Toolkit. We couldn’t quite put our finger on the qualities of someone we would want to join the team, but it was much easier to write down what we did NOT want. Some examples of the “thanks, but no thanks” category were ego driven, fixed mindset, did not want to collaborate or learn, and traditional/set in their ways. The team got passionate about this discussion, especially because we all agreed we wanted to maintain the cultural attributes of the team when adding training new folks.

Have you put off creating a persona or solving a problem because landing on the “right” solution felt too daunting? We encourage you to try flipping the script and flexing your reverse thinking muscles to define the “nope’s” before getting to the, “Yup, that’s it!” We all deserve to be off the hook for thinking of the “right” thing every now and then, we can finally get to a truly innovative solution – something different that makes a difference.

How To Be Helpful (in 5 Questions)

How To Be Helpful (in 5 Questions)

NOTE: This post originally appeared as a LinkedIn article.

These days we’re all increasingly aware of significant problems that need to be addressed, whether it’s the pandemic or systematic racism or climate change. Naturally, we’d all like to do our part and lend a hand, but it’s not always clear how to start. Here are five questions you may want to ask as you look for ways to be helpful and make a difference.

1) What is already being done in this area?

Before launching a new effort, take some time to educate yourself about what activities are already under way. Get to know the organizations and people working in that space, understand their efforts, priorities, and activities. This way you avoid reinventing the wheel, operating at cross purposes with like-minded people, or inadvertently undermining work that others are doing. Plus, if someone else is making progress, you may be able to work together and make a difference sooner than if you were starting from scratch.

For example, several of my colleagues and I were planning to attend South By Southwest this year. When the conference got cancelled because of the pandemic, the first thing we did was look for something to do instead. Specifically, we asked the question “Is anyone putting together a list of online talks and workshops, or maybe some local in-person events, now that nobody is going to SXSW?” We hoped the answer would be yes, but after several days of research and outreach, we were unable to find any such effort, so we started to think about doing something ourselves. This led to the next question.

2) Would it be helpful if we did __________?

If you’ve got an idea for something you think would be helpful, it’s wise to check with the people around you to see if they also think it would be helpful. A posture of curiosity, humility, and generosity will go a long way in building a coalition to actually do the thing, as well as ensuring that good intentions produce good results. Framing the idea in the form of a specific question – and being open to a variety of answers – is a much more inclusive message than simply saying “I’m going to do this.”

To continue the example, our specific question was along the lines of “Would it be helpful if we posted a lightly curated list of links to online talks about innovation and creativity?” We weren’t committing to doing anything just yet, and we weren’t suggesting we could recreate the whole conference experience (or even a meaningful slice of the experience). In fact, it wasn’t even about SXSW anymore. Instead, we described a modest idea that we thought might bring people together to share some ideas, and asked if that sounded helpful.

The response was overwhelmingly positive. More than 70 people immediately responded to say they would find such a list helpful. Even better, a bunch of them offered their assistance (jumping ahead to question #3). Of course, you can’t please everyone and the answer wasn’t unanimous. One person objected that this list would be unhelpful. We tried to be respectful of that position, accommodate their concerns, and cause no harm, while still honoring the larger group’s interest. That led to the third question.

3) Who wants to do this with us?

After learning about current efforts and soliciting feedback about your proposed idea, the next step is to see whether anyone wants to do it with you. If the second question is about interest, this one is about commitment and collaboration.

As our “list of talks” idea continued to mature, we made a wide-open invitation to anyone who wanted to join in. Loads of amazing people offered to provide amazing content. The benefits of collaborating are obvious and we don’t need to belabor that point. But the really cool thing about this question is it may help you discover potential partners you did not find after asking question #1.

That was certainly the case with us this past March. While our initial research did not uncover any organized effort to assemble a list of innovation-related webinars and presentations, it turns out we were just a little ahead of the curve. A few other groups began developing a similar idea right around that time, and this third question helped us find them.

Specifically, the Defense Innovation Network Summit (DINS) and the Public Spend Forum (PSF) both hosted online sessions that coincided with ours. They were excited to partner with us, so we added their links to our rapidly growing list and a few of us even gave presentations on their platforms.

Two weeks after asking our first question, we kicked off Innovation Resiliency 2020. This was a full day of online presentations, panels, book talks, and discussions, on topics ranging from improv to aviation to learning from failure. Our final list of talks included 16 presentations, plus 15 presentations curated by DINS (with even more on other days), and a big list of PSF’s events across that whole week. We could not have done any of it without the generous, enthusiastic, creative partners who came alongside.

4) What did we learn so far?

If the first three questions are focused on being helpful now, this fourth question increases the odds we’ll be helpful in the future. Solving problems is an iterative process, and every finish line is actually the starting line for your next race. So be sure to do a little reflection along the way, putting in the effort to collect lessons and insights for the future.

The full list of things we learned from the Innovation Resiliency project goes well beyond the scope of this article, but trust me, we learned a ton and have applied those lessons to several other areas.

One thing to keep in mind when asking this question: you don’t have to wait until you’ve done the thing. In fact, even though it comes fourth, this is a pretty good question to ask at every point in the process.

5) What might we do next?

This capstone question wraps up the results of the first four. How we choose to answer it will depend in large part on what’s been done so far and what help is still needed. It will depend on who’s involved and what we’ve learned. Answer the first four questions well and this fifth one should practically answer itself.

And of course, one of the things you might do next is… tell your story and share your lessons, just like we did with this post.

7 tips to practice ‘Yes, And…’ during everyday collaboration

7 tips to practice ‘Yes, And…’ during everyday collaboration

Q: Team Toolkit, I love using ‘Yes, And…’ during your ITK workshops! I want more collaboration like this outside of the workshop. How can I use ‘Yes, And…’ during my regular, everyday interactions with my team?

A: Great question, anonymous audience member! Taking an effective workshop practice into your everyday interactions with your team is a fantastic ambition, and we’d love to help you with this.

In case you need a refresher, last week we covered what ‘Yes, And…’ entails. At its heart – ‘Yes, And…’ is a practice of accepting and building off of each other’s inputs, which requires being present and active listening. These attitudes can most certainly be practiced in everyday interactions.

Since many of us are working virtually, we’ll focus our everyday tips on virtual interactions but know that these 7 tips can be similarly used for in-person interactions.


To demonstrate accepting and building off of each other’s inputs:

Tip #1) Acknowledge ideas and efforts explicitly!

Whether it’s the best idea or the worst, you can always acknowledge that a teammate has put something out there. Start your response with this acknowledgment. You can use phrases such as “Thanks for offering your ideas!” or “Thanks for getting us started!” And if you like the idea, say so!

Tip #2) Show your excitement!

You could probably see this coming based on the examples in Tip #1: When writing, exclamation points are your friend! If that feels like too much, try italicized text. Use lighthearted and playful words that feel like a casual conversation, rather than formal phrases that feel boxy and forced. Conduct a thesaurus search for positive words, such as delight, joy, or wonderful. Get creative!

Tip #3) Invite others into the conversation by name. 

Especially when you’re in a group thread, sometimes it can be unclear when to jump in or not. When you respond positively to a teammate’s input, try offering not only your input but also include an invitation for a specific someone else to add their input.

By adding a specific name, now it’s clear whose input is next. It’s like an improv comedian passing the scene to a fellow performer, through a look, gesture, or question. This also helps ensures that the dialogue will keep going, which helps the initiating teammate feel that their input is valued and being acted upon. We’ve all felt the despair that accompanies sending an email into the internet black hole. Don’t let your teammates feel this way.

Tip #4) Literally use the words “Yes, and”

Sometimes the most obvious is the hardest to see. By actually using the words “Yes, and,” it will show your acceptance and how you are building off of your teammate’s input. Bonus points if your teammates are also familiar with this workshop practice because it may remind them to start writing “Yes, and” too.


To demonstrate being present and active listening:

Tip #5) Send a timely response.

This tip can be quite difficult if you’re struggling with staying on top of your inbox (#allofus). However, even if your response is to simply acknowledge that you’ve received the message and will respond more thoughtfully later, sending this type of quick heads up note shows that you are being present. It goes without saying that you should follow through with a more thoughtful response later. 

Tip #6) Be a role model for being present and practice vulnerability.

How many of us have been tackling a problem and gotten stuck? Exactly (#allofus). Now, how many of us have messaged our team when we are stuck to simply state that we’re stuck? Exactly (#fewofus).

By being present with your own situation and vulnerably sharing where you are – whether you are stuck or just had a breakthrough – can be a powerful role modeling of behavior that the rest of your team will imitate. By practicing vulnerability, it achieves two very powerful outcomes:

1) It invites others to also put their guard down and share where they are too, which helps co-create the safe and trusting environment for your team.

2) It creates an opportunity for someone else to say ‘Yes, and’ to you 

Tip #7) Pay close attention to calls for help, which may require reading between the lines.

This tip is a companion to Tip #6, and it requires empathy and grace. While you’re building more camaraderie and trust amongst your team, it may initially be both unfamiliar and uncomfortable for teammates to directly ask for help or share when they feel stuck, overwhelmed, or confused (which further reinforces why being a role model in Tip #6 is so valuable).

When you sense that this type of situation is at play, this is the most critical time to be responsive and actively listen. Through your words, you can acknowledge the situation and also demonstrate that you’ve really heard what your teammate is actually trying to convey.

For example, one teammate may send out a team message reporting on their research for a broad topic. They feel unsure of which sub-topics to continue researching deeper because they found so many. Rather than a specific ask for help, they close their message by asking “Thoughts?” broadly to the team.

In this example, you could respond by saying “Great research! That is an overwhelming set of sub-topics we could dig into, how about starting with sub-topic X? Teammate Jane Doe, what do you think?”

By naming the “overwhelming set,” you acknowledge that there are many choices and it’s not clear which is the best choice. You’ve also offered your input by suggesting an idea. And bonus points – with these two sentences, you’ve also practiced Tip #1, #2 and #3!

– – –

Team Toolkit Example of Everyday ‘Yes, And…’

Now that we’ve gone over the 7 tips for everyday ‘Yes, And…’ collaboration, let’s see a real life example of this! This example shows a message thread amongst Team Toolkit, and you’ll see my narrator commentary in the far right and I’ve highlighted the relevant text in green.

Context: It’s the Friday afternoon before Memorial Day weekend and also the first 3-day weekend since the beginning of full-time working from home due to covid, a.k.a. it’s an especially quiet Friday afternoon. Team Toolkit’s high school intern is graduating and headed to college in the fall. The ITK teammate who works most closely with our high school intern is organizing a collective group card to wish her well in this next chapter.

ITK Teammate 1

12:09 PM

Our ITK High School intern is graduating this year.  We would have done something anyway to celebrate her graduation.  However the city of Lawrence, where she lives in has been disproportionately affected by the pandemic so I definitely want to do something for her now.

I’m happy to send along a card with a gift card, messages, and am happy to sign people’s names.  So let me know if you want me to write a message for you and if you want to make a contribution.  No pressure, of course.  I probably won’t do a video unless someone else wants to work with me on it.  I would need some partnering, just because putting it together and editing it feels overwhelming to do alone. 😝


Tip #6 – ITK Teammate 1 has practiced vulnerability and is asking for help

ITK Teammate 2

1:12 PM

Yes, let’s absolutely do something for our ITK High School Intern to show our appreciation and support.

Thanks ITK Teammate 1 for initiating us! When’s your ideal deadline for this?

I can help create a compilation video if folks are willing to go on camera. The initial thought I had was a round-robin video with each person giving a ~10-20 sec good wish, and a final shot of all us and some group sentiment (happy graduation/ good luck in college/ thank you/ etc).

I have no idea how to actually do this, but I’m willing to try if folks are willing to record! Pretty sure we can leverage zoom to do these recordings.

ITK Teammate 3 and ITK Teammate 4, I know both of you have done video editing – any tips?

Tip #4 – Literally use the words “Yes, and”

Tip #2 – Show your excitement.

Tip #6 – Now ITK Teammate 2 has practiced vulnerability and is asking for help. They also offer an idea.

Tip #6 again

Tip #3 – Invite others into the conversation by name.

ITK Teammate 1

2:02 PM

Looks like we need to get the videos to the school by June 3.  I’m not sure how long it will take to edit the videos together, but we have 11 days including weekends.


Tip #5 – Send a timely response. Notice the timestamp of the last 3 exchanges: Although it was a Friday afternoon, the elapsed time is ~1 hr between each response.

ITK Teammate 5

2:03 PM

What about a Zoom conf and we all take the time to say something and just screen record that? Tip #5 – Now another teammate has chimed in and notice the timestamp again. They’ve quickly chimed in and are also building off of ITK Teammate 2’s idea

ITK Teammate 4

2:10 PM

That’s a brilliant idea ITK Teammate 5 – yes, let’s record a group Zoom session. We all may want to script up a few words (or at least do a little thinking about what we want to say), but that definitely feels like the easiest / fastest / smoothest way for us all to send our high school intern a message that really reflects the team and how we work. 😊 Now we have another teammate responding, and here we see Tip #1, #2, #4, and #5!

ITK Teammate 2

2:16 pm

< sends a meeting invite to the whole team with a zoom meeting link> Tip #5 – responding quickly to the idea

ITK Teammate 2

2:17 ppm

Sweet! I added a 30-min video recording session after our Team Toolkit meeting next Thurs. We’re having that meeting in MS Teams so we can keep going in there, OR I also set up a Zoom meeting if we want to switch. The (video recording) world shall be our oyster 😊 Tip #1 and #2


Upon returning from the Memorial Day Holiday, the rest of Team Toolkit also begins chiming in….

ITK Teammate 6 I like the zoom recording idea! Tip #1 and #2
ITK Teammate 3 Love the Zoom idea! Tip #1 and #2
ITK Teammate 7

If we were really snazzy… we’d all dust off the crayons and markers and each make an 8-1/2×11” letter spelling  G-O-O D L-U-C-K (if we were on Zoom, where we could brady bunch said message). Not sure if this would work, but ITK Teammate 3 and I could represent two letters

·       ITK Teammate 3: G

·       ITK Teammate 7: O

·       ITK Teammate 4: O

·       ITK Teammate 8: D

·       ITK Teammate 5: L

·       ITK Teammate 9: U

·       ITK Teammate 2: C

·       ITK Teammate 6: K

·       ITK Teammate 1: !

This being said, not sure how this would play out in terms of “order” on the screen. Does anyone know if you can move the order of participants around?

Tip #2 – ITK Teammate 7 has gotten excited and continues building off the idea


Tip # 6 – Practices vulnerability

ITK Teammate 2

Love this idea!

We can do it in “speaker view” and have each person say something so their camera is the focus. Aka the letters will display serially, rather than in brady brunch view.

Tip #1 and #2


Continues building off the idea

ITK Teammate 4

Amazing!

One way we could do this is for someone to assign the letters once we’re all dialed in and can see what order we’re in… we just wouldn’t do the letters in advance.

Tip #2


More building off the idea

ITK Teammate 6

So cute!

Yeah, I think we could do the GOODLUCK in gallery view and agree with ITK Teammate 4 and then speaker view for our messages!

Tip #2


Tip #4

ITK Teammate 1 Yasss! I love this and everyone’s creativity!

Tip #1, #2, and #4

Tip #5 – Notice that it was ITK Teammate 1 that started the thread, and they also closed the loop and acknowledged everyone’s inputs.


Hopefully seeing this real life example sparks new ideas for how you can practice ‘Yes, and…’ in everyday interactions with your team. Let us know how you use these 7 tips in the comments below!

– – –

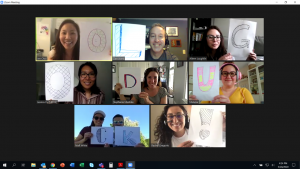
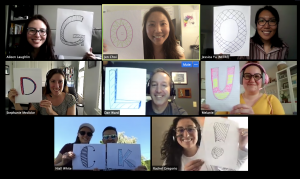
P.S. Curious how the final recording of our video message went? Check out two snapshots and the video recordings below! After many more ‘Yes, And…’ moments live on the zoom meeting, we successfully recorded our “Good Luck” video message to our ITK High School intern!

Take 1: Team Toolkit spells “OLGODUCK!”

Team Toolkit holds up letters that spell 'OLGODUCK'

Take 2: Team Toolkit wishes “GOOD LUCK!”

Team Toolkit holds up letters that spell


And last but not least: The final video as posted on Notre Dame Criso Rey High School’s YouTube, Facebook, and Instagram!