by dbward | Apr 29, 2019 | Tools 101
This week’s post is about an ideation tool called the Lotus Blossom.
This colorful & simple tool is like Mindmapping on a grid. It helps people go deeper / get more creative than a standard brainstorming session. Also, engineers tend to LOVE this one.
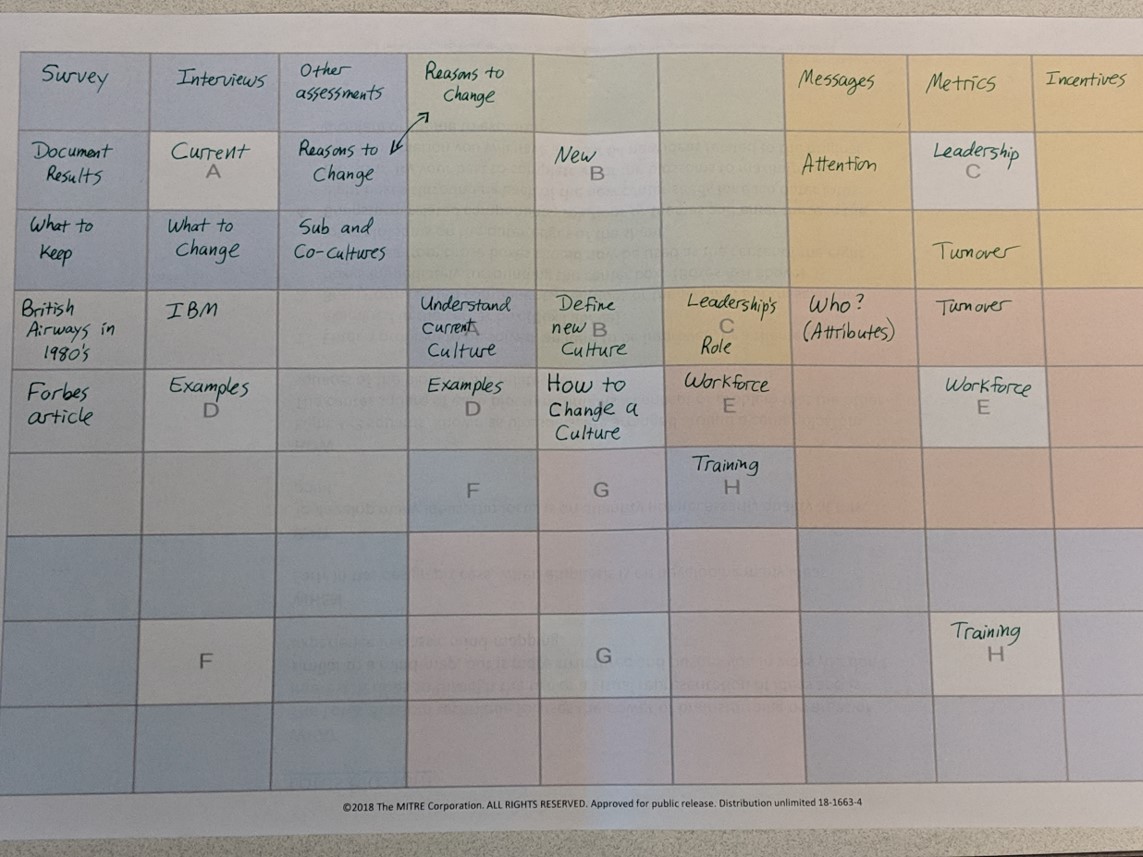
The photo below shows an example of a partially filled-out Lotus Blossom. To get started write the topic, problem, or concept you’re working on in the center box. In the example I wrote Culture Change. In the 8 colorful boxes around it (A-H) write down facets of the problem / topic / etc. In my example, I wrote understand the current culture, define the new culture, leadership’s role, and so on.
Next, expand the blossom from the central box to the outer boxes (aka the blossoms). To do this, just copy the words from the middle grid to the lettered boxes on the outside of the grid. You’ll see the word Current in the white box in the upper left corner.
Then add the next level of detail in the colored boxes around each blossom. So Current Culture might involve doing a survey, performing interviews, and documenting our research results.
Keep going until you’ve filled in all the boxes.
Full instructions and a downloadable template are available here.

by Niall White | Mar 18, 2019 | Facilitation Tips, Tools 101
As we wander around and share ITK with people, we get a lot of questions. In this week’s post, we’d like to share some answers to the more frequently asked questions. Don’t see your question here? Send it to us in an email (ITK@mitre.org) or post it in the comments section.
Q: Where do I start?
Fortunately, there are many options to choose from! Ask yourself if you want to ideate and generate or evaluate and consolidate. From there, you can choose tools that will assist you accordingly. In general, there are tools that assist in divergent (ex. “Lotus Blossom”) and convergent (ex. “Stormdraining”) thinking.
Q: How much time will I need?
From formal day-long workshops to “notes on a napkin” dinner discussions, the ITK tools can be used in a variety of settings. A System Map, for example, may be used for a small, simple process involving few relationships, no competition, and little policy, requiring little time to complete. It can also be used for a multi-organizational operation that involves thousands of stakeholders and dozens of competitors. This would obviously take much longer to complete.
So timeframes vary based on your needs, constraints, and objectives. Give yourself enough time to really dig into the processes and seek a diversity of thought. On the other hand, don’t be afraid to hold your own mini workshop at your desk when you only have a few minutes. In general, you will get as much out of these tools as you put into them, but they are highly adaptable to your specific situation.
Q: Why put structure on creativity?
Being creative doesn’t just mean brainstorming or randomly throwing ideas on a whiteboard (though these can be pretty helpful practices!). We’ve found that providing some structure to your process can help teams produce higher quality ideas in less time. These tools focus our creativity on the problem at hand, rather than having to invent the method as well as the solution.
Most of the ITK tools really come down to asking the right questions at the right time. They help unlock creativity, uncover hidden assumptions, and build consensus. For example, When prioritizing the stakeholders in your system, you may just make a list and start prioritizing. Using a Community Map, however, gives you steps to identify allies, audiences, and influencers, prioritize them based on a set of criteria, and then take specific actions to move forward.
The other big benefit is that most of the tools result in a sharable artifact that documents the creative ideas your team came up with.
Q: What resources will I need?
It sort of depends on which tools you choose and what setting you’re in. However, in most cases you will generally need: the right minds (get the right people in the room), a physical space conducive to your activities, any needed materials (markers, sticky notes, whiteboards, tables & chairs, a camera, handouts, etc.) and a workshop outline (doesn’t need to be anything formal; just a plan of what you want to accomplish and how).
Check out a previous blog post for more details about the workshop facilitation kits we use.
Q: When should I use these tools?
All the time! These tools can be used for framing problems, understanding users, and generating ideas early in the process of launching a program. They can also be used for evaluating options, developing plans, reducing complexity, and other later-phase tasks.
Each tool description includes a short explanation of When to use it, but the truth is most of them can be used at any time. As a general rule, it is good practice to start using them earlier in a project rather than later, as you may identify artifacts pivotal to your course of action. Need help picking the right tool or the right time? Drop us a note at ITK@mitre.org and we’d be glad to talk you through it.

by rgregorio | Jan 22, 2019 | Team Toolkit, Tools 101
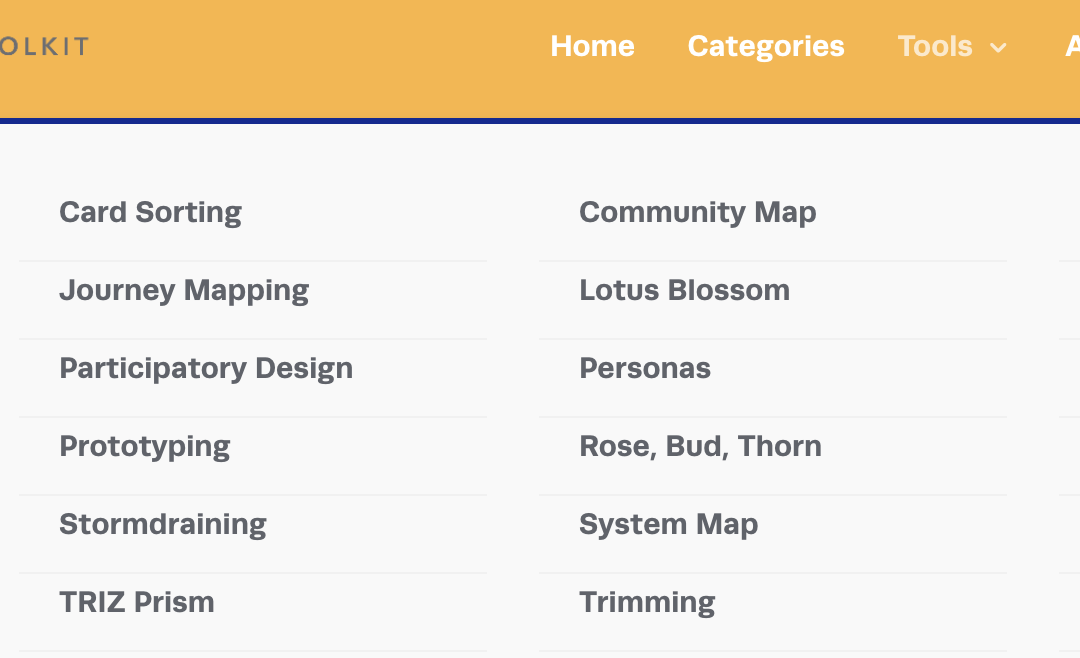
You’ve decided to check out some of the MITRE Innovation Toolkit (ITK) methods for creative problem solving, but not sure where to start? A list of 24 oddly named tools (“What the heck is a TRIZ Prism?”) dauntingly stares back at you. Don’t worry – we can help find the right tool for you!
Start by asking yourself some questions about your project or problem. Is the team just getting started, or are things well under way? What are you looking to accomplish? Where are you trying to go? When we work directly with ITK users, these are some of the questions we use to figure out how we can best help.
Once you’ve got a sense of where you are and where you’re heading, click over to the Categories page. There you’ll find groupings based on where you are in your process.
You’ll notice that while one of the categories is “Generate Ideas,” our toolkit offers methods that go far beyond brainstorming. For example, tools in the “Frame Problem” category help are usually most relevant early in the process. In contrast, the tools in the Reduce Complexity category tend to be particularly helpful at a project’s later stages.
Project teams often struggle to articulate the problem they’re trying to solve or have varying definitions amongst the team members. If that’s where you’re at, the Problem Framing tool can help build consensus. Other times, teams lack a good understanding of their users – that’s where the Persona tool comes in. And if complexity is getting out of control, try Trimming.
Here’s a final tip: each tool’s description includes a brief explanation of When and Why to use it. You may want to browse through the collection and see what catches your attention.
And of course, feel free to reach out to usat any time!
Post by Rachel Gregorio


