
by choij | Jun 15, 2020 | Facilitation Tips, Tutorials, yes and |
Q: Team Toolkit, every workshop you host begins with Collaboration Rules that the whole group agrees to for that workshop. I keep seeing the ‘Yes, And…’ rule. What exactly is it and why is it always included?
A: ‘Yes, And…’ is definitely one of our favorite collaboration rules, and I’d even go so far as to say that it’s one of the Top 3 MUST’s for an effective innovation workshop.
Many may not know, but ‘Yes, And…’ is actually a practice borrowed from improv comedy. In an improv sketch, a group of comedians are given an initial scenario with no planned script. One by one, they build off of each other’s inputs to create a dynamic, group comedy sketch. Since it’s live and in real-time, comedians are making things up as they go, and the result is often outrageous or extremely silly, thus adding to the comedic humor of the scenario.
What’s central to this improv practice is that each of the comedians accepts, and then builds off of what the prior person has said. This requires active listening, where each comedian is present in the moment and listening to what others are saying, rather than lost in their own thoughts or preparing a rebuttal.
By continuously agreeing and building off of each other, this creates a key enabler: A safe and trusting environment. Since each comedian knows that their inputs will be built off of, rather than dismissed or ridiculed, they know it’s okay if they don’t say the perfect next statement or even make a mistake. Their fellow teammates may pivot that “mistake” into comedic gold. This helps each performer feel free to experiment, knowing they will be supported rather than undermined or contradicted.
When we bring this improv practice into the business world, you can imagine how powerful this practice can be!
By creating a cooperative environment where participants feel safe to voice their thoughts, this candidness unlocks openings for key insights which can be critical for innovation. These insights may have otherwise remained hidden, and the team may have continued to be stuck or stagnant.
Not only that, fostering levity and playfulness also encourages silliness and allows creativity to flourish. Oftentimes, the best ideas derive from the silliest inputs, so these are certainly not to be dismissed! Creativity widens the aperture for what’s possible and gives permission to the participants to expand their thinking in new ways which were previously blocked.
There are boundless scenarios and team environments where this improv practice of ‘Yes, And…’ could be of value. I encourage you to try it out with your team, and let us know in the comments below what has worked for you!
by rgregorio | May 4, 2020 | Facilitation Tips
 The Innovation Toolkit believes that “constraints breed creativity,” and with this new COVID-19 environment, we’re all working within a brand-new set of constraints. Given we’re all meeting online more than ever, we wanted to share some best practices and lessons learned from the first couple months of collaborating remotely.
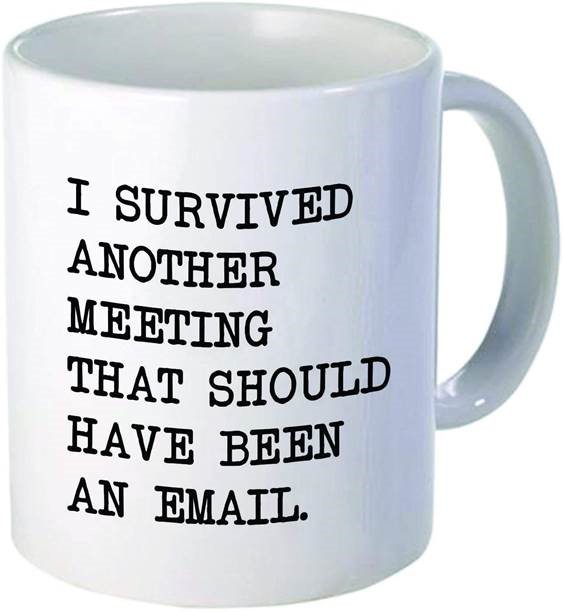
Before beginning the journey to hosting a successful online gathering (meeting, workshop, etc), first ask if the thing is even necessary in the first place. As the popular meme asks, “Could this meeting have been an email?” It’s important to recognize that we’re all dealing with new challenges, demands, and external factors that may affect our availability to participate in a virtual meeting.
Next, let’s admit that no matter what people may say about our “new normal,” this is not normal. Preparing and hosting a successful virtual gathering requires more time and effort when compared to an in-person meeting. Technology, distractions, and lack of non-verbal cues require preparation and risk mitigation strategies and techniques, and you’ve got to work extra hard to encourage active participation and a productive use of time.
To help you navigate these challenges, Team Toolkit assembled this collection of field-tested tips and techniques, and we hope you find them useful as well.
BEFORE the meeting
- Define the purpose. When you deemed the meeting necessary, you likely identified “why.” Get specific about the reason for the gathering, and avoid general explanations like “touch base” or “team brainstorm.”
- Understand the intended outcome(s). What does success look like? This should be specific so that the meeting participants can be held accountable.
- Determine who needs to be invited. Choose invitees wisely, as you’ll likely have more participation with fewer participants. If you have a large group, divide them into pre-assigned breakout groups (< 5 people) and call on the teams for responses rather than individuals. Assign roles such as team leads, notetaker, timekeeper, and chat monitor. You may want to provide office hours for participants to ask questions about their roles or technology beforehand or have follow-up questions after.
- Assign prework. What can be completed before the meeting so that it will take the least amount of time to get to the desired output? What can be done or collected asynchronously to make the best use of the time together in the meeting? Keep in mind, an hour of time multiplied by twenty people adds up quickly. What kind of preparation will make their time in the meeting more worthwhile?
- Prepare a detailed agenda. Create a specific and deliberate plan that limits the time you need people to pay attention. Bake in extra time for technical hiccups. Set time limits for each agenda item, map out points of interaction, and decide which communication tool(s) you’ll use. Allow some time in the front-end of the agenda for people to log in late. Also, if you’re leading the thing, be sure to log in early.
BEGINNING of the meeting
- Log in early to set up. Allow some space in your calendar to log onto the meeting early if you are the host to ensure everything is working as intended. Do a communications check with a trusted team member to ensure your audio is coming through clearly and screenshare is working. Have a redundant capability ready in case of degraded communications, such as logging in via cell phone audio.
- Orient participants to the tool. Once enough folks have joined, provide them verbal instructions on where to find their mute/unmute button (stay on mute unless you’re talking) and where to find the chat. Ask folks to give you a reaction in the chat (thumbs up, say hi, type your name, etc.) to get them familiar. This exercise also sets up an initial interaction and reinforces chat as an approved medium.
- Be inclusive of anyone not able to view the screen. Some participants may have called in or be unable to see the screen for a variety of reasons. Be sure to know if anyone in your meeting is in that situation. You may want to send files via email and verbally describe what we’re looking at on the screen. Asking “can anyone not see this?” helps prevent anyone from being left out.
- Set ground rules and meeting objective(s). Recognize that the ground rules may differ slightly from in-person meetings. Get buy-in from participants with a “thumbs up” in chat. Some that we have used include:
- Be Present
- State your name before speaking
- One hot mic at a time
- Temporarily turn on your webcam when speaking (if bandwidth/tool allows)
- Leave your title/rank at the door; everyone’s input is equally valued
- Affirm and build on each other’s ideas (“Yes, and…”) and be supportive rather than judgmental
- Articulate hidden assumptions
- Challenge cherished beliefs
- Encourage wild, crazy ideas – don’t censor your ideas
- Suspend judgment; practice grace
DURING the meeting
- Use chat. Take advantage of this added benefit to collect rapid inputs from people without everyone needing to unmute themselves. You can use it to ask for inputs and ideas or confirm understanding. Encourage people to respond with emojis, thumbs up, etc. if possible. Assign someone to be the chat monitor and relay questions to the presenter or answer them directly. Those who are less vocal may feel more comfortable sharing ideas via chat. Be sure to allow people time to formulate and type their ideas.
- Indicate who has the “hot mic” and who will have it next. When people don’t know when they will have time to respond, everyone jumps in, which creates more digital fumbling. Either state who will talk next to give them a heads up or assign an order of responses. If going around the room, give everyone a set amount of time (e.g. 90 seconds) for their response.
- Repeat yourself multiple times. This may seem obvious, but people are likely to get distracted and miss what you said the first and second time. With everyone more accessible working from home, it’s likely their receiving pings from chats, emails, texts, and more.
- Be patient. People tend to speak longer without non-verbal cue, so you’ll need to allow participants to finish their thoughts before moving on (or get good at kindly interrupting them). When asking for a response, wait double the amount of time you normally would allowing buffer time for bandwidth delays, digital fumbling to unmute, etc. The silence may feel awkward at first, but it creates space for everyone to participate.
- Collect ideas via the “one, some, all” method. Before opening up floodgates of discussion, give everyone time to brainstorm ideas individually, then discuss in smaller groups, and finally share out a summary of those ideas with everyone. Following this process gives participants time to think deeply about the question on their own before being swayed by others’ opinions.
- Refer to participants by name. In place of face-to-face closeness and eye contact, using people’s names can help establish rapport. When someone responds to your question, thank them using their name or call on people you haven’t heard from…with grace. Recognize that if you haven’t heard from them, they may have been distracted. Recommend starting with their name to get their attention, and ask specific For example, “Rachel, we want to give you a chance to chime in. What do you think is the best way to get people’s attention on virtual meetings?” is better than “Rachel, you haven’t said anything, what do you think about that?”
- Take difficult conversations offline. If receiving pushback from participants – especially with those you may not have interacted with before – it may be difficult to resolve the conflict in a virtual setting. Suggest taking the conversation offline so as to not lose group momentum.
AFTER the meeting
- Send out any products or notes. For anyone who was unable to make the meeting or any action items discussed, share the output of the meeting.
- Determine if you need another meeting. Sometimes one meeting can lead to another, even if it’s to review next steps or hold office hours. Don’t wait too long to schedule this meeting, as folks will lose track of the meeting thread.

by rgregorio | Apr 6, 2020 | Facilitation Tips |
The COVID-19 pandemic is changing the nature of the way we work, including how we host workshops and collaborate with each other. In the midst of a pandemic, the Innovation Toolkit partnered with Bridging Innovation to work virtually with sponsors to craft challenge statements for submission to the Small Business Innovation Research (SIBR) process. The workshop trained participants on a tool chain that translated specific gaps into broader challenge statements for startups to propose business ideas to solve said challenges. At the end of the workshop series, the participants left with the beginnings of a publicly-releasable challenge statement to share with nontraditional solution providers through initiatives like the AFWERX/Air Force Research Lab (AFRL) SBIR Program. Like other Bridging Innovation initiatives, SIBR programs build pathways to discover, accelerate, and deliver innovation from non-traditional sources to solve national problems.
Challenge Statements are designed to capture the problem space while not outlining an expected or explicit solution, so that companies understand why the problem exists and why it is important to solve. Here are some tips for writing a good challenge statement:
- Write in plain English with few acronyms
- Choose a challenge that is real, has impact, and does not have an adequate solution
- Explain who the stakeholders are and why this challenge is important
- Outline the company incentive and how it’s worthwhile for them
What was meant to be a half-day, in-person workshop morphed into a week-long workshop series, 0900-1000 EST daily, introducing the next part of the tool chain. Day 1 introduced the purpose of the workshop and the first two tools – Lotus Blossom and Storm Draining – to get the teams brainstorming about their challenge areas (divergent thinking) and down-selecting to one idea (convergent thinking). Day 2, the group reviewed how the exercises went and moved on to Problem Framing to more specifically define the problem. Day 3 was a review of the refined problem statements before moving onto the TRIZ Prism to generalize the problem. On the final day, the participants shared their challenge statements.
As a follow-on to the workshop, the Bridging and ITK teams are planning to set up officer hours to provide feedback on participants’ challenge statements as the week did not provide enough time to share the statements with sponsors and iterate based on feedback.
Given the evolving COVID-19 circumstances, this workshop was ITK’s first ever fully virtual workshop with participants joining via Skype for Business from their homes. The presenters shared their webcams, which helped build some familiarity, but others had technical difficulties or wanted to save bandwidth. We made good use of the chat window, asking participants to provide a “thumbs up” if the content resonated. Since the ITK tools have yet to be digitized (spoiler: it’s in the works), we provided participants with editable PowerPoint versions as a makeshift way to replace our in-person 11×17 printouts and post-its.
Some ideas for future sessions:
- Ask participants to share their faces on webcam if possible
- Give participants more lead time to clear schedules for both the training sessions as well as break out team sessions
- Move to an every-other-day model
- Schedule break out sessions with teams and assign facilitators to them
- Assign team captains to share team’s work for accountability
- Identify specific participants and roles so facilitators can call people out by name
If you are interested in hosting a challenge statement workshop for your team, don’t hesitate to reach out to us. Hopefully some of these tips will be helpful in your upcoming virtual workshops.

by rgregorio | Mar 30, 2020 | Facilitation Tips |
When pitching a method from the Innovation Toolkit, we are (not surprisingly) occasionally met with a little resistance… or even a brick wall or two. The tools and methods we’re suggesting people try are generally new, foreign, and might require people to step a bit out of their comfort zone, so it’s natural for some people to feel reluctant or even skeptical!
Early adopters are the minority in any domain, and ITK is no exception. Our early adopters are the risk-takers willing to try something new that might potentially fail. For those who are not early adopters, pushback might be direct like some of the statements below, or it might just be a passive nod that reads: “I hear what you are saying, but I don’t know how to respond. You seem passionate, so I’ll just smile and change the subject as soon as possible…”
Rather than dropping the suggestion, we recommend some friendly and understanding ways to handle naysayers and find a way through those walls. Here are some of the most common objections and a few thoughts on how to respond.
“This won’t work in our culture.”
It might be helpful to introduce the tools in a less conspicuous way. For example, instead of using the full Rose, Bud, Thorn, we might simply explain the purpose and have a conversation about what’s good, bad, and promising. We don’t always need to use the full canvas or plaster the wall with colorful post-it’s to get the impact of the tools.
“Can’t get people together in the same room.”
That’s OK! The tools can be used virtually if you have screen sharing and remote collaboration capabilities. Alternatively, we could introduce the tools to folks to use asynchronously from their own workspaces.
“We don’t have the time / money / resources.”
All of the tools are free to use and scalable, so holding a session can fit into your existing work schedule. Spend the last 15 minutes of your weekly team meeting to try out [insert tool here]. If it’s not useful, we don’t have to use it again.
“We can’t get everyone to break away like that.”
Of course, everyone is busy. Remember: these tools are not adjacent to the work we’re all supposed to be doing. They actually ARE the work, and they generally help us do the work faster, better, and more productively. Also keep in mind most of the tools are scalable and customizable for your purposes. If you only have a short period of time, I’d recommend setting a time limit for the session and see if people are interested in a follow on. A 15-minute Lotus Blossom could be just what the doctor ordered.
“We already have folks who do this.”
Fantastic. Feel free to use any of our tools with your own facilitators or let us know if you would like a new perspective! We’re always open to collaborating.
“The facilitators don’t have the right subject expertise.”
Sometimes an objective third-party facilitator can bring new perspectives and ask questions that might not occur to people who are closer to the problem and more familiar with the content. Our trained facilitators can support the conversation and get people talking more openly and honestly. Of course, if you’d prefer to not have us facilitate, we’re happy to simply recommend tools you can use on your own
Hopefully some of these tips resonate with your situation and can help move forward a team to use some of the ITK methods. Have you encountered any other objections? If so, please share them and how you handled it below!

by rgregorio | Nov 12, 2019 | Facilitation Tips
I started wearing a wristwatch at a young age – one of those with Minnie Mouse on it (see more about my Disney obsession here). That meant I ended up being the one people would look to when a classroom didn’t have a clock on the wall or we went outside for gym class: “Rachel! How much time is left?” I would proudly announce the time, as my classmates rolled their eyes, hoping time would accelerate to the next bell. In hindsight, my role as the timekeeper started at a young age.

Being the timekeeper is one of the many hats that we wear as facilitators in Innovation Toolkit workshops and is a key element of running any meeting. It’s important to keep participants focused on achieving the goals the meeting or workshop set out to achieve. It also makes the session more predictable, productive, and generates results. It’s helpful to have these times set and shared with participants so everyone can help the day stay on track and cut down on meaningless tangents (we’ve all been there). This is why we always develop an agenda before a workshop.
Here are some steps to developing an agenda for your next workshop or meeting:
- Identify the high-level objective for the session and work backwards
- Define the activities that will help achieve those goals
- Add in filler activities such as introductions, breaks (as needed), meals (if applicable), etc. so that people don’t get burnt out
- Providing snacks, caffeine, sugar are also good tips to keep people energized through a marathon session
- Rank activities by level of importance in a flow that makes logical sense, such as a tool chain where the input of one activity is input for the next
- Allot more time to the more important activities (and less time to less important)
- Introductions are probably less important if people already know each other, but you want to make sure you provide people with a bio break at some point during a morning or afternoon session
- Break down the larger activities – e.g. Premortem tool – into bite-sized chunks such as explaining the tool, giving people time to work alone, discussing as a group, coalescing around an idea, and identifying next steps
- Creating the sub-times will help you to determine how much time each activity needs.
- Sometimes we purposely provide less time than the participants need so there is some excitement to continue after the workshop has ended.
Once you’ve developed a draft agenda, be sure to run it by the stakeholders and decision-makers to receive buy-in. Even better if you can design and draft it with them! Having their buy-in will make the session go more smoothly as they are consistently on your side.
Now that you’re in the meeting, here are some tips:
- Distribute the agenda to participants so they can set their expectations of the day. Before each time interval, let people know where you are and how much time you have for the activity. If there is a larger block of time, provide reminders partway through (“2 minutes left…”) to keep participants aware of how much time is remaining.
- Oftentimes, it’s necessary to adapt on the fly and adjust to the situation – whether it be a new priority, unforeseen circumstance or a late participant. Keep in mind that changing the agenda on the fly is a constant time negotiation. Every time you say yes to one thing, you say no to something else. In other words, if we pursue this new conversation, what other topic or activity are we sacrificing? Try to have those conversations with the decision-maker and stakeholders beforehand; what can be cut out in favor of a superseding priority?
- If the conversation veers off track, we recommend keeping a “Parking Lot” of other items to focus the conversation. Let the participant know that what they brought up is important and will be covered later if time allows.
- Consider using a visual timekeeper on a screen in the room for longer sessions and larger groups so that others can serve as the timekeeper with you.
Many of these tips and recommendations can be repurposed or adapted for regular meetings, from prioritizing objectives and outcomes to (politely) reminding people how much time is left. Keeping meetings goal-oriented and focused will lead to more productive and successful collaboration amongst your team. In an era where everyone is busy, we need to remember that time is not a renewable resource. One of the most common objections to doing Innovation Toolkit workshops is “not enough time” or people being afraid to take a step back for fear of losing time while working towards a deadline. For that reason, we must guard our time fiercely. Don’t forget to wear your wristwatch!

by dbward | Jul 29, 2019 | Facilitation Tips
We’ve all been in meetings where one person talks too much, haven’t we? As facilitators, this can be a challenging situation to manage. On the one hand, we want to honor each person’s contribution and willingness to participate. Shutting someone down can have a chilling effect, not just on the individual but on the group as a whole.
At the same time, it’s important to make sure everyone gets to participate, and if one person is dominating the conversation, the whole group misses out on hearing from other voices.
To paraphrase Sun Tzu, the best way to deal with this situation is to prevent it from happening in the first place. Be sure to set some ground rules in every workshop’s introductory comment. Make it clear that everyone in the group has a role to play and something to contribute. Encourage people to be mindful of sharing the stage and inviting others to speak.
I’ve even been known to do a little public math: “We have 20 people in the room for a one-hour meeting. If everyone speaks for 3 minutes, that’ll be the whole meeting.” For some people, it helps to hear the actual numbers explicitly called out.
And of course, despite the best preparation and guidelines, it still happens. Someone goes off on a tangent, unrolls an endless story, or otherwise monopolizes the group’s time and attention. They might have a good point or a useful observation, but it’s just gone on a bit longer than necessary.
Or maybe they’re just rambling and someone needs to stop them.
Here’s what I do when that happens: With a big smile and a nod or two, I hand the over-talker a pen and a stack of sticky notes. I say something along the lines of “Hey, that’s a really important point – could you write it down in your own words? I want to make we make sure we really capture it before we go much further.”
Depending on how much the talker is paying attention to the other people in the room, I might have to stand up and/or move closer to them, physically intervening to get their attention and create a pause in their monologue. I’m always amazed how a little shift in my posture or my location can help change a room’s dynamics.
This technique does several things simultaneously.
First, it solves the immediate problem of one person speaking too much, because it’s really hard for most people to talk and write at the same time. Putting a pen in someone’s hand basically turns off their mouth.
Second, it affirms the person’s contribution to the discussion. This is the opposite of “Shut up and move on.” Instead, it’s “Keep going, but do it in a different mode.”
Finally, it gives the person a chance to really clarify their point and distill it into a more focused package. They may discover that they weren’t really saying much worth writing, or they may uncover their actual point in a more cogent fashion. Everyone wins.
Got a facilitation tip? We’d love to hear it! Leave your suggestions in the comments section, or drop us an email at ITK@mitre.org to continue the conversation!
