Q: Team Toolkit, I love using ‘Yes, And…’ during your ITK workshops! I want more collaboration like this outside of the workshop. How can I use ‘Yes, And…’ during my regular, everyday interactions with my team?
A: Great question, anonymous audience member! Taking an effective workshop practice into your everyday interactions with your team is a fantastic ambition, and we’d love to help you with this.
In case you need a refresher, last week we covered what ‘Yes, And…’ entails. At its heart – ‘Yes, And…’ is a practice of accepting and building off of each other’s inputs, which requires being present and active listening. These attitudes can most certainly be practiced in everyday interactions.
Since many of us are working virtually, we’ll focus our everyday tips on virtual interactions but know that these 7 tips can be similarly used for in-person interactions.
To demonstrate accepting and building off of each other’s inputs:
Tip #1) Acknowledge ideas and efforts explicitly!
Whether it’s the best idea or the worst, you can always acknowledge that a teammate has put something out there. Start your response with this acknowledgment. You can use phrases such as “Thanks for offering your ideas!” or “Thanks for getting us started!” And if you like the idea, say so!
Tip #2) Show your excitement!
You could probably see this coming based on the examples in Tip #1: When writing, exclamation points are your friend! If that feels like too much, try italicized text. Use lighthearted and playful words that feel like a casual conversation, rather than formal phrases that feel boxy and forced. Conduct a thesaurus search for positive words, such as delight, joy, or wonderful. Get creative!
Tip #3) Invite others into the conversation by name.
Especially when you’re in a group thread, sometimes it can be unclear when to jump in or not. When you respond positively to a teammate’s input, try offering not only your input but also include an invitation for a specific someone else to add their input.
By adding a specific name, now it’s clear whose input is next. It’s like an improv comedian passing the scene to a fellow performer, through a look, gesture, or question. This also helps ensures that the dialogue will keep going, which helps the initiating teammate feel that their input is valued and being acted upon. We’ve all felt the despair that accompanies sending an email into the internet black hole. Don’t let your teammates feel this way.
Tip #4) Literally use the words “Yes, and”
Sometimes the most obvious is the hardest to see. By actually using the words “Yes, and,” it will show your acceptance and how you are building off of your teammate’s input. Bonus points if your teammates are also familiar with this workshop practice because it may remind them to start writing “Yes, and” too.
To demonstrate being present and active listening:
Tip #5) Send a timely response.
This tip can be quite difficult if you’re struggling with staying on top of your inbox (#allofus). However, even if your response is to simply acknowledge that you’ve received the message and will respond more thoughtfully later, sending this type of quick heads up note shows that you are being present. It goes without saying that you should follow through with a more thoughtful response later.
Tip #6) Be a role model for being present and practice vulnerability.
How many of us have been tackling a problem and gotten stuck? Exactly (#allofus). Now, how many of us have messaged our team when we are stuck to simply state that we’re stuck? Exactly (#fewofus).
By being present with your own situation and vulnerably sharing where you are – whether you are stuck or just had a breakthrough – can be a powerful role modeling of behavior that the rest of your team will imitate. By practicing vulnerability, it achieves two very powerful outcomes:
1) It invites others to also put their guard down and share where they are too, which helps co-create the safe and trusting environment for your team.
2) It creates an opportunity for someone else to say ‘Yes, and’ to you.
Tip #7) Pay close attention to calls for help, which may require reading between the lines.
This tip is a companion to Tip #6, and it requires empathy and grace. While you’re building more camaraderie and trust amongst your team, it may initially be both unfamiliar and uncomfortable for teammates to directly ask for help or share when they feel stuck, overwhelmed, or confused (which further reinforces why being a role model in Tip #6 is so valuable).
When you sense that this type of situation is at play, this is the most critical time to be responsive and actively listen. Through your words, you can acknowledge the situation and also demonstrate that you’ve really heard what your teammate is actually trying to convey.
For example, one teammate may send out a team message reporting on their research for a broad topic. They feel unsure of which sub-topics to continue researching deeper because they found so many. Rather than a specific ask for help, they close their message by asking “Thoughts?” broadly to the team.
In this example, you could respond by saying “Great research! That is an overwhelming set of sub-topics we could dig into, how about starting with sub-topic X? Teammate Jane Doe, what do you think?”
By naming the “overwhelming set,” you acknowledge that there are many choices and it’s not clear which is the best choice. You’ve also offered your input by suggesting an idea. And bonus points – with these two sentences, you’ve also practiced Tip #1, #2 and #3!
– – –
Team Toolkit Example of Everyday ‘Yes, And…’
Now that we’ve gone over the 7 tips for everyday ‘Yes, And…’ collaboration, let’s see a real life example of this! This example shows a message thread amongst Team Toolkit, and you’ll see my narrator commentary in the far right and I’ve highlighted the relevant text in green.
Context: It’s the Friday afternoon before Memorial Day weekend and also the first 3-day weekend since the beginning of full-time working from home due to covid, a.k.a. it’s an especially quiet Friday afternoon. Team Toolkit’s high school intern is graduating and headed to college in the fall. The ITK teammate who works most closely with our high school intern is organizing a collective group card to wish her well in this next chapter.
|
ITK Teammate 1
12:09 PM
|
Our ITK High School intern is graduating this year. We would have done something anyway to celebrate her graduation. However the city of Lawrence, where she lives in has been disproportionately affected by the pandemic so I definitely want to do something for her now.
I’m happy to send along a card with a gift card, messages, and am happy to sign people’s names. So let me know if you want me to write a message for you and if you want to make a contribution. No pressure, of course. I probably won’t do a video unless someone else wants to work with me on it. I would need some partnering, just because putting it together and editing it feels overwhelming to do alone. 😝
|
Tip #6 – ITK Teammate 1 has practiced vulnerability and is asking for help
|
|
ITK Teammate 2
1:12 PM
|
Yes, let’s absolutely do something for our ITK High School Intern to show our appreciation and support.
Thanks ITK Teammate 1 for initiating us! When’s your ideal deadline for this?
I can help create a compilation video if folks are willing to go on camera. The initial thought I had was a round-robin video with each person giving a ~10-20 sec good wish, and a final shot of all us and some group sentiment (happy graduation/ good luck in college/ thank you/ etc).
I have no idea how to actually do this, but I’m willing to try if folks are willing to record! Pretty sure we can leverage zoom to do these recordings.
ITK Teammate 3 and ITK Teammate 4, I know both of you have done video editing – any tips?
|
Tip #4 – Literally use the words “Yes, and”
Tip #2 – Show your excitement.
Tip #6 – Now ITK Teammate 2 has practiced vulnerability and is asking for help. They also offer an idea.
Tip #6 again
Tip #3 – Invite others into the conversation by name.
|
|
ITK Teammate 1
2:02 PM
|
Looks like we need to get the videos to the school by June 3. I’m not sure how long it will take to edit the videos together, but we have 11 days including weekends.
|
Tip #5 – Send a timely response. Notice the timestamp of the last 3 exchanges: Although it was a Friday afternoon, the elapsed time is ~1 hr between each response. |
|
ITK Teammate 5
2:03 PM
|
What about a Zoom conf and we all take the time to say something and just screen record that? |
Tip #5 – Now another teammate has chimed in and notice the timestamp again. They’ve quickly chimed in and are also building off of ITK Teammate 2’s idea |
|
ITK Teammate 4
2:10 PM
|
That’s a brilliant idea ITK Teammate 5 – yes, let’s record a group Zoom session. We all may want to script up a few words (or at least do a little thinking about what we want to say), but that definitely feels like the easiest / fastest / smoothest way for us all to send our high school intern a message that really reflects the team and how we work. 😊 |
Now we have another teammate responding, and here we see Tip #1, #2, #4, and #5! |
|
ITK Teammate 2
2:16 pm
|
< sends a meeting invite to the whole team with a zoom meeting link> |
Tip #5 – responding quickly to the idea |
|
ITK Teammate 2
2:17 ppm
|
Sweet! I added a 30-min video recording session after our Team Toolkit meeting next Thurs. We’re having that meeting in MS Teams so we can keep going in there, OR I also set up a Zoom meeting if we want to switch. The (video recording) world shall be our oyster 😊 |
Tip #1 and #2 |
Upon returning from the Memorial Day Holiday, the rest of Team Toolkit also begins chiming in….
| ITK Teammate 6 |
I like the zoom recording idea! |
Tip #1 and #2 |
| ITK Teammate 3 |
Love the Zoom idea! |
Tip #1 and #2 |
| ITK Teammate 7 |
If we were really snazzy… we’d all dust off the crayons and markers and each make an 8-1/2×11” letter spelling G-O-O D L-U-C-K (if we were on Zoom, where we could brady bunch said message). Not sure if this would work, but ITK Teammate 3 and I could represent two letters
· ITK Teammate 3: G
· ITK Teammate 7: O
· ITK Teammate 4: O
· ITK Teammate 8: D
· ITK Teammate 5: L
· ITK Teammate 9: U
· ITK Teammate 2: C
· ITK Teammate 6: K
· ITK Teammate 1: !
This being said, not sure how this would play out in terms of “order” on the screen. Does anyone know if you can move the order of participants around?
|
Tip #2 – ITK Teammate 7 has gotten excited and continues building off the idea
Tip # 6 – Practices vulnerability
|
| ITK Teammate 2 |
Love this idea!
We can do it in “speaker view” and have each person say something so their camera is the focus. Aka the letters will display serially, rather than in brady brunch view.
|
Tip #1 and #2
Continues building off the idea
|
| ITK Teammate 4 |
Amazing!
One way we could do this is for someone to assign the letters once we’re all dialed in and can see what order we’re in… we just wouldn’t do the letters in advance.
|
Tip #2
More building off the idea
|
| ITK Teammate 6 |
So cute!
Yeah, I think we could do the GOODLUCK in gallery view and agree with ITK Teammate 4 and then speaker view for our messages!
|
Tip #2
Tip #4
|
| ITK Teammate 1 |
Yasss! I love this and everyone’s creativity! |
Tip #1, #2, and #4
Tip #5 – Notice that it was ITK Teammate 1 that started the thread, and they also closed the loop and acknowledged everyone’s inputs.
|
Hopefully seeing this real life example sparks new ideas for how you can practice ‘Yes, and…’ in everyday interactions with your team. Let us know how you use these 7 tips in the comments below!
– – –
P.S. Curious how the final recording of our video message went? Check out two snapshots and the video recordings below! After many more ‘Yes, And…’ moments live on the zoom meeting, we successfully recorded our “Good Luck” video message to our ITK High School intern!
Take 1: Team Toolkit spells “OLGODUCK!”
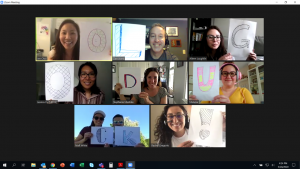
Take 2: Team Toolkit wishes “GOOD LUCK!”

And last but not least: The final video as posted on Notre Dame Criso Rey High School’s YouTube, Facebook, and Instagram!

