
by rgregorio | Jun 8, 2020 | Keeping up with the team |
It’s day 80 of quarantine and social distancing in COVID-19. Day 80 of wearing a mask at the grocery store and wiping down everything with Clorox wipes. Day 80 of not hugging my closest family and friends. Day 80 of working from home, sitting on back to back virtual meetings. I don’t know about you, but it’s getting old.
Like many, the first few weeks of “stay-at-home” were a refreshing change of pace from the hectic commuter life and travel schedule. Getting to tackle projects in the peace and quiet of your own home away from the office allowed for a mental refresh and more productive schedule. We got creative with moving our in-person meetings to virtual, trying out new tools to replace whiteboard sessions, and uploaded our favorite scenic destinations as our Zoom backgrounds. “Look at me, I’m working from the beach in Hawaii!”
But now that we’ve been in this for close to 100 days, the novelty has worn off and the need for synchronous communication and constant meetings has become grating. Without the short walk between conference rooms, there is no time to switch contexts from meeting to meeting and even less time to get work done, unless you multi-task during another call, thus making that meeting less productive. I’ve found myself overemoting on webcam calls, constantly aware of my facial expressions in the bottom corner of the screen and feeling a pressing need to connect with people through the camera. How long and hard can I stare at the bright green light next to my webcam before going blind?
I am grateful to have a job that allows me to work from home in these unprecedented times, so I do grapple with complaining about a first world problem of privilege. I surface the issue of burn out because if we ignore the burn out, we won’t make it through this period of quarantine and long-term future of quarantine. What can we do about the need for constant virtual meetings, given remote work appears to be our “new normal”? I’ve tried a few strategies to no avail, such as blocking some chunks of time on my calendar for working hours, only to be found out my colleagues asking if I’m “really booked all day.” I’ve also asked if a meeting needed to happen or updates could be given via email, sometimes met with a, “Yes, I do have updates to share.”
Maybe the changes need to come from the top down. Some companies have recognized this burnout and set one day a week to be free from meetings, so people can get some time back on their schedule to crank through work. A cultural shift like this might help an organization focus on working asynchronously for one day a week. That being said, having a holiday Monday off this week led to four days of extra jam-packed schedule due to the lacking calendar space.
I present this problem as a call to action for all of us to do better. I’m not sure how to affect change aside from leading by example. I will continue to question the meetings that I’m invited to and say “no” more often to protect my own sanity. I encourage you to lead the change so we can shift the meeting-heavy culture from the bottom up. Challenge the status quo, ask why we do the things we do, and only attend meetings where your presence will make an impact. That’s what innovation is all about.
What has your team tried? What’s working for you? How can we innovate together to make things better?
by rgregorio | May 4, 2020 | Facilitation Tips
 The Innovation Toolkit believes that “constraints breed creativity,” and with this new COVID-19 environment, we’re all working within a brand-new set of constraints. Given we’re all meeting online more than ever, we wanted to share some best practices and lessons learned from the first couple months of collaborating remotely.
Before beginning the journey to hosting a successful online gathering (meeting, workshop, etc), first ask if the thing is even necessary in the first place. As the popular meme asks, “Could this meeting have been an email?” It’s important to recognize that we’re all dealing with new challenges, demands, and external factors that may affect our availability to participate in a virtual meeting.
Next, let’s admit that no matter what people may say about our “new normal,” this is not normal. Preparing and hosting a successful virtual gathering requires more time and effort when compared to an in-person meeting. Technology, distractions, and lack of non-verbal cues require preparation and risk mitigation strategies and techniques, and you’ve got to work extra hard to encourage active participation and a productive use of time.
To help you navigate these challenges, Team Toolkit assembled this collection of field-tested tips and techniques, and we hope you find them useful as well.
BEFORE the meeting
- Define the purpose. When you deemed the meeting necessary, you likely identified “why.” Get specific about the reason for the gathering, and avoid general explanations like “touch base” or “team brainstorm.”
- Understand the intended outcome(s). What does success look like? This should be specific so that the meeting participants can be held accountable.
- Determine who needs to be invited. Choose invitees wisely, as you’ll likely have more participation with fewer participants. If you have a large group, divide them into pre-assigned breakout groups (< 5 people) and call on the teams for responses rather than individuals. Assign roles such as team leads, notetaker, timekeeper, and chat monitor. You may want to provide office hours for participants to ask questions about their roles or technology beforehand or have follow-up questions after.
- Assign prework. What can be completed before the meeting so that it will take the least amount of time to get to the desired output? What can be done or collected asynchronously to make the best use of the time together in the meeting? Keep in mind, an hour of time multiplied by twenty people adds up quickly. What kind of preparation will make their time in the meeting more worthwhile?
- Prepare a detailed agenda. Create a specific and deliberate plan that limits the time you need people to pay attention. Bake in extra time for technical hiccups. Set time limits for each agenda item, map out points of interaction, and decide which communication tool(s) you’ll use. Allow some time in the front-end of the agenda for people to log in late. Also, if you’re leading the thing, be sure to log in early.
BEGINNING of the meeting
- Log in early to set up. Allow some space in your calendar to log onto the meeting early if you are the host to ensure everything is working as intended. Do a communications check with a trusted team member to ensure your audio is coming through clearly and screenshare is working. Have a redundant capability ready in case of degraded communications, such as logging in via cell phone audio.
- Orient participants to the tool. Once enough folks have joined, provide them verbal instructions on where to find their mute/unmute button (stay on mute unless you’re talking) and where to find the chat. Ask folks to give you a reaction in the chat (thumbs up, say hi, type your name, etc.) to get them familiar. This exercise also sets up an initial interaction and reinforces chat as an approved medium.
- Be inclusive of anyone not able to view the screen. Some participants may have called in or be unable to see the screen for a variety of reasons. Be sure to know if anyone in your meeting is in that situation. You may want to send files via email and verbally describe what we’re looking at on the screen. Asking “can anyone not see this?” helps prevent anyone from being left out.
- Set ground rules and meeting objective(s). Recognize that the ground rules may differ slightly from in-person meetings. Get buy-in from participants with a “thumbs up” in chat. Some that we have used include:
- Be Present
- State your name before speaking
- One hot mic at a time
- Temporarily turn on your webcam when speaking (if bandwidth/tool allows)
- Leave your title/rank at the door; everyone’s input is equally valued
- Affirm and build on each other’s ideas (“Yes, and…”) and be supportive rather than judgmental
- Articulate hidden assumptions
- Challenge cherished beliefs
- Encourage wild, crazy ideas – don’t censor your ideas
- Suspend judgment; practice grace
DURING the meeting
- Use chat. Take advantage of this added benefit to collect rapid inputs from people without everyone needing to unmute themselves. You can use it to ask for inputs and ideas or confirm understanding. Encourage people to respond with emojis, thumbs up, etc. if possible. Assign someone to be the chat monitor and relay questions to the presenter or answer them directly. Those who are less vocal may feel more comfortable sharing ideas via chat. Be sure to allow people time to formulate and type their ideas.
- Indicate who has the “hot mic” and who will have it next. When people don’t know when they will have time to respond, everyone jumps in, which creates more digital fumbling. Either state who will talk next to give them a heads up or assign an order of responses. If going around the room, give everyone a set amount of time (e.g. 90 seconds) for their response.
- Repeat yourself multiple times. This may seem obvious, but people are likely to get distracted and miss what you said the first and second time. With everyone more accessible working from home, it’s likely their receiving pings from chats, emails, texts, and more.
- Be patient. People tend to speak longer without non-verbal cue, so you’ll need to allow participants to finish their thoughts before moving on (or get good at kindly interrupting them). When asking for a response, wait double the amount of time you normally would allowing buffer time for bandwidth delays, digital fumbling to unmute, etc. The silence may feel awkward at first, but it creates space for everyone to participate.
- Collect ideas via the “one, some, all” method. Before opening up floodgates of discussion, give everyone time to brainstorm ideas individually, then discuss in smaller groups, and finally share out a summary of those ideas with everyone. Following this process gives participants time to think deeply about the question on their own before being swayed by others’ opinions.
- Refer to participants by name. In place of face-to-face closeness and eye contact, using people’s names can help establish rapport. When someone responds to your question, thank them using their name or call on people you haven’t heard from…with grace. Recognize that if you haven’t heard from them, they may have been distracted. Recommend starting with their name to get their attention, and ask specific For example, “Rachel, we want to give you a chance to chime in. What do you think is the best way to get people’s attention on virtual meetings?” is better than “Rachel, you haven’t said anything, what do you think about that?”
- Take difficult conversations offline. If receiving pushback from participants – especially with those you may not have interacted with before – it may be difficult to resolve the conflict in a virtual setting. Suggest taking the conversation offline so as to not lose group momentum.
AFTER the meeting
- Send out any products or notes. For anyone who was unable to make the meeting or any action items discussed, share the output of the meeting.
- Determine if you need another meeting. Sometimes one meeting can lead to another, even if it’s to review next steps or hold office hours. Don’t wait too long to schedule this meeting, as folks will lose track of the meeting thread.
by rgregorio | Apr 6, 2020 | Facilitation Tips |
The COVID-19 pandemic is changing the nature of the way we work, including how we host workshops and collaborate with each other. In the midst of a pandemic, the Innovation Toolkit partnered with Bridging Innovation to work virtually with sponsors to craft challenge statements for submission to the Small Business Innovation Research (SIBR) process. The workshop trained participants on a tool chain that translated specific gaps into broader challenge statements for startups to propose business ideas to solve said challenges. At the end of the workshop series, the participants left with the beginnings of a publicly-releasable challenge statement to share with nontraditional solution providers through initiatives like the AFWERX/Air Force Research Lab (AFRL) SBIR Program. Like other Bridging Innovation initiatives, SIBR programs build pathways to discover, accelerate, and deliver innovation from non-traditional sources to solve national problems.
Challenge Statements are designed to capture the problem space while not outlining an expected or explicit solution, so that companies understand why the problem exists and why it is important to solve. Here are some tips for writing a good challenge statement:
- Write in plain English with few acronyms
- Choose a challenge that is real, has impact, and does not have an adequate solution
- Explain who the stakeholders are and why this challenge is important
- Outline the company incentive and how it’s worthwhile for them
What was meant to be a half-day, in-person workshop morphed into a week-long workshop series, 0900-1000 EST daily, introducing the next part of the tool chain. Day 1 introduced the purpose of the workshop and the first two tools – Lotus Blossom and Storm Draining – to get the teams brainstorming about their challenge areas (divergent thinking) and down-selecting to one idea (convergent thinking). Day 2, the group reviewed how the exercises went and moved on to Problem Framing to more specifically define the problem. Day 3 was a review of the refined problem statements before moving onto the TRIZ Prism to generalize the problem. On the final day, the participants shared their challenge statements.
As a follow-on to the workshop, the Bridging and ITK teams are planning to set up officer hours to provide feedback on participants’ challenge statements as the week did not provide enough time to share the statements with sponsors and iterate based on feedback.
Given the evolving COVID-19 circumstances, this workshop was ITK’s first ever fully virtual workshop with participants joining via Skype for Business from their homes. The presenters shared their webcams, which helped build some familiarity, but others had technical difficulties or wanted to save bandwidth. We made good use of the chat window, asking participants to provide a “thumbs up” if the content resonated. Since the ITK tools have yet to be digitized (spoiler: it’s in the works), we provided participants with editable PowerPoint versions as a makeshift way to replace our in-person 11×17 printouts and post-its.
Some ideas for future sessions:
- Ask participants to share their faces on webcam if possible
- Give participants more lead time to clear schedules for both the training sessions as well as break out team sessions
- Move to an every-other-day model
- Schedule break out sessions with teams and assign facilitators to them
- Assign team captains to share team’s work for accountability
- Identify specific participants and roles so facilitators can call people out by name
If you are interested in hosting a challenge statement workshop for your team, don’t hesitate to reach out to us. Hopefully some of these tips will be helpful in your upcoming virtual workshops.

by rgregorio | Mar 30, 2020 | Facilitation Tips |
When pitching a method from the Innovation Toolkit, we are (not surprisingly) occasionally met with a little resistance… or even a brick wall or two. The tools and methods we’re suggesting people try are generally new, foreign, and might require people to step a bit out of their comfort zone, so it’s natural for some people to feel reluctant or even skeptical!
Early adopters are the minority in any domain, and ITK is no exception. Our early adopters are the risk-takers willing to try something new that might potentially fail. For those who are not early adopters, pushback might be direct like some of the statements below, or it might just be a passive nod that reads: “I hear what you are saying, but I don’t know how to respond. You seem passionate, so I’ll just smile and change the subject as soon as possible…”
Rather than dropping the suggestion, we recommend some friendly and understanding ways to handle naysayers and find a way through those walls. Here are some of the most common objections and a few thoughts on how to respond.
“This won’t work in our culture.”
It might be helpful to introduce the tools in a less conspicuous way. For example, instead of using the full Rose, Bud, Thorn, we might simply explain the purpose and have a conversation about what’s good, bad, and promising. We don’t always need to use the full canvas or plaster the wall with colorful post-it’s to get the impact of the tools.
“Can’t get people together in the same room.”
That’s OK! The tools can be used virtually if you have screen sharing and remote collaboration capabilities. Alternatively, we could introduce the tools to folks to use asynchronously from their own workspaces.
“We don’t have the time / money / resources.”
All of the tools are free to use and scalable, so holding a session can fit into your existing work schedule. Spend the last 15 minutes of your weekly team meeting to try out [insert tool here]. If it’s not useful, we don’t have to use it again.
“We can’t get everyone to break away like that.”
Of course, everyone is busy. Remember: these tools are not adjacent to the work we’re all supposed to be doing. They actually ARE the work, and they generally help us do the work faster, better, and more productively. Also keep in mind most of the tools are scalable and customizable for your purposes. If you only have a short period of time, I’d recommend setting a time limit for the session and see if people are interested in a follow on. A 15-minute Lotus Blossom could be just what the doctor ordered.
“We already have folks who do this.”
Fantastic. Feel free to use any of our tools with your own facilitators or let us know if you would like a new perspective! We’re always open to collaborating.
“The facilitators don’t have the right subject expertise.”
Sometimes an objective third-party facilitator can bring new perspectives and ask questions that might not occur to people who are closer to the problem and more familiar with the content. Our trained facilitators can support the conversation and get people talking more openly and honestly. Of course, if you’d prefer to not have us facilitate, we’re happy to simply recommend tools you can use on your own
Hopefully some of these tips resonate with your situation and can help move forward a team to use some of the ITK methods. Have you encountered any other objections? If so, please share them and how you handled it below!
by rgregorio | Jan 20, 2020 | Tools 101
Choosing the right tool for your specific situation is an important first step, because trying to use the wrong tool can be frustrating and wastes time. One tool I find useful in a wide range of situations is the Journey Map, so this week’s blog post takes a look at what it is and how to use it.
Journey maps are a quick way to learn about a process from a user’s perspective – the actions they take, the questions they ask, the good and bad elements of the journey, and the opportunities for improvement. It’s a great way to identify bottlenecks, workarounds, and wins to improve a process.
It’s called a “journey map” because it illustrates a “journey” of one persona or user through the ups and downs of their experience. We often develop an “as is” journey map before making recommendations for a “to be” journey map, identifying what needs to change from one to the other.
While the journey map has many of the same qualities our other tools have – scalable, lightweight, high impact, and fun – it has a couple of characteristics that make it my MVP in the Toolkit.
Puts you in the user’s shoes. Like many of the ITK tools, this one puts the user at the center of our process. More than other tools, though, Journey Map allows you to really walk a mile in your user’s shoes. It starts with the Persona tool to understand the user’s background, goals, roles, and responsibilities, then inserts that user into the context of a process. It expands the scope of a persona so we can see what software they use, who is on their team, the struggles they face, and what keeps them up at night.
As humans, we’re natural-born storytellers. We like a beginning, middle, and end. Viewing a journey from the user’s perspective provides that and quickly creates deep understanding.
Helps you ask the right questions. Many of the tools provide a framework for asking the uncomfortable questions or those that we’re assumed to know (“What problem are we trying to solve?”). Often, processes are seen as obvious or are based on unstated (and unexamined!) assumptions. The journey mapping script I’ve drafted (included at the end of this blog) helps you glean expertise and knowledge from users from their perspective. This script can be used with your users to build your own journey map. I encourage you to adjust the script as necessary based on what you need to capture. Following the script makes the process feel more accessible and doable, compared to starting from scratch.
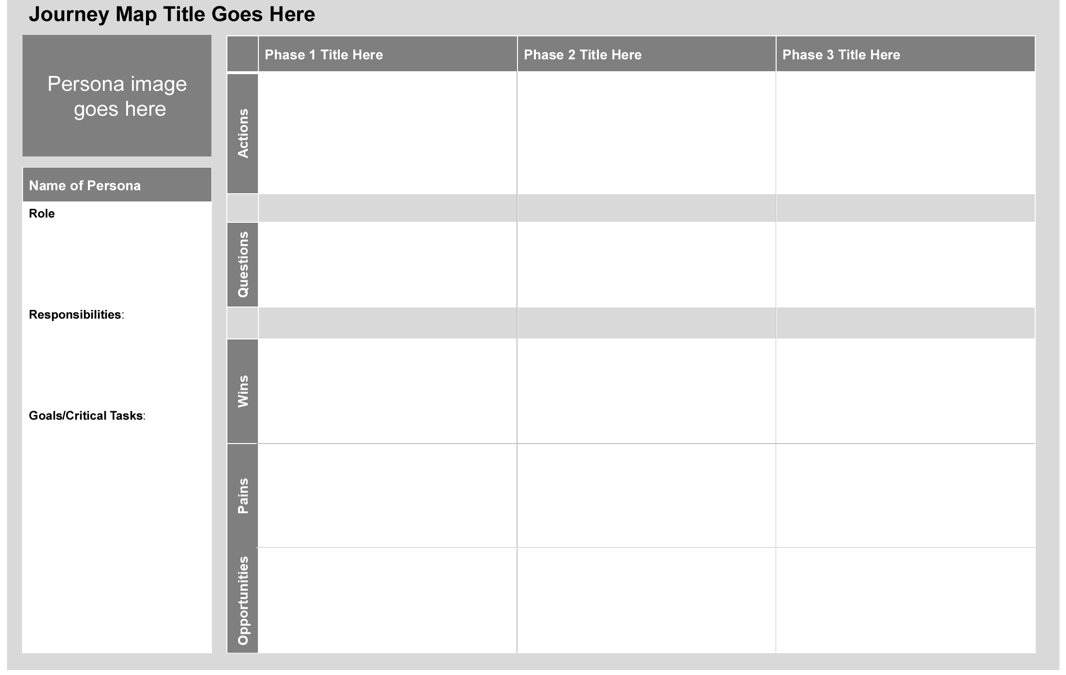
A polished output builds consensus. My favorite part about the tool is the polished, visual output, which can easily be built in PowerPoint or Word, and serves as an artifact to build consensus. When moving from your interview results to the finished journey map, using action verbs and descriptive language will encourage more people to understand the user journey.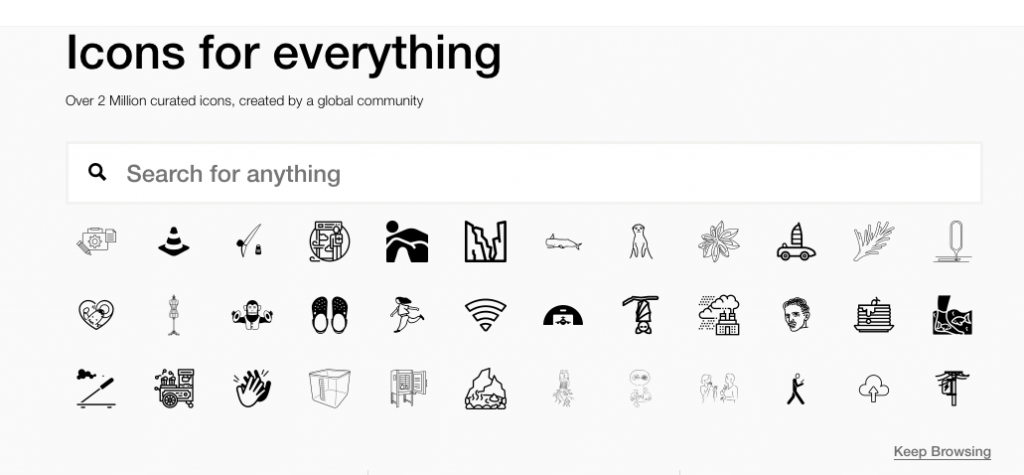
You may want to use icons to add some visual interest to more quickly communicate your ideas. The end product is organized, accessible, and looks like it took a long time to create. I find a lot of good icons at The Noun Project
To show what I mean by a polished end product with impact, here is a sample journey map we developed to map the entire MITRE Travel and Expense process (with the details deliberately fuzzed-out). This map was used to determine if a new integrated solution would alleviate some of the identified pains and take advantage of some opportunities. Each colored box indicated different aspects of the journey – steps in the process, pain points, work-arounds, etc. By depicting it visually, we could see which parts worked well and which need to be improved.

If you have any questions, don’t hesitate to reach out to our team via our Contact form!
Generic Journey Map Script
Persona Development
- What is your background in [service area]?
- What are the responsibilities of a [role] at MITRE? What are your daily goals/challenges?
AS IS Journey
- What is a typical timeline for your process from start to finish? Would you walk through the process starting with [point A to point B]?
- What is each step in the process? What does it entail? How important is it?
- Which steps in the process are most critical?
- Who is involved (in every step?) Your team? Outside your team?
- How long does each step take? How long does the overall process take?
- What tools do you use to support your steps/process? e.g. artifacts, reports, software, communication
Issues/Challenges
- How would you identify an issue in the process? How often do issues arise?
- Where are the pain points in the process?
- How soon into the process would you be aware of problems?
- Are there hand-offs/bottlenecks in your process?
Reflection
- What works well and what doesn’t in the process?
- What opportunities do you see in the process? What has potential to be better?
- Where do you see the need for improvements and how do you think these improvements will support your goals?
TO BE Journey
- What would be needed in a new process?
- How could you make a revised process more efficient?
- What will change from the “as is” process?