Today’s blog post is by guest blogger Tasia Gladkova
Working in design and 3D printing means a lot of prototyping. At the Advanced Manufacturing Lab at MITRE, I often work on iterating designs and bringing people’s visions into 3D space. When browsing the ITK website, I wanted to see if there were any guidelines to help with the prototyping process—not just in physical design, but also in software and experiences. The initial version of the tool didn’t give me the detail I wanted, so my co-lab manager, Lilia Chan, and I decided to transform our daily thought processes into a new ITK Prototyping tool.
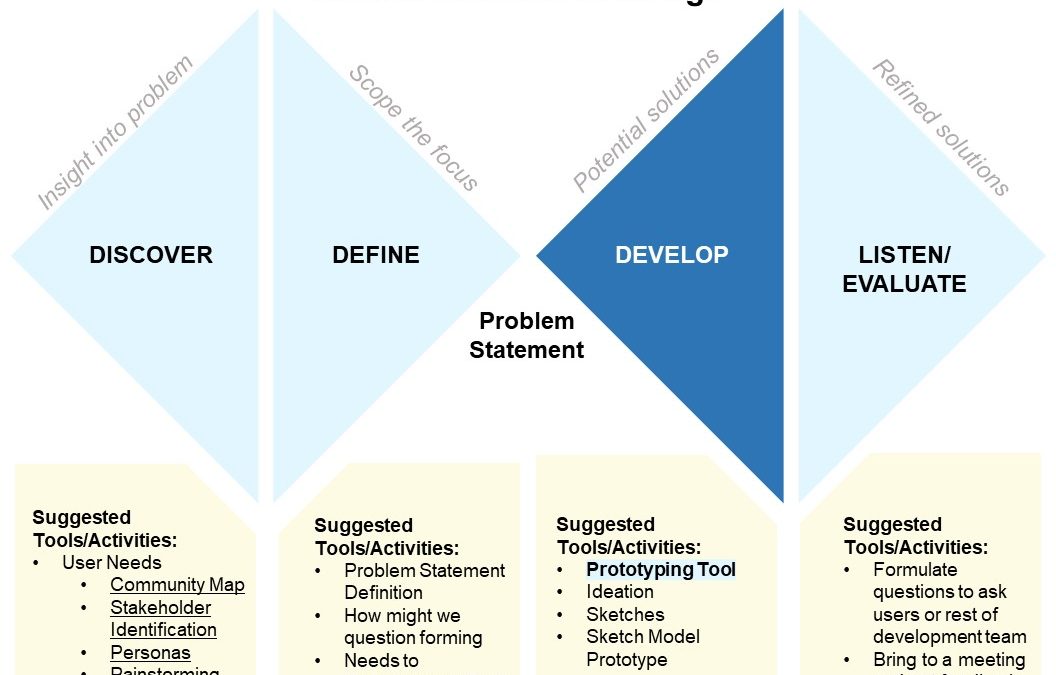
A cornerstone of many designers’ processes is the Double Diamond of Design (see picture). Before starting on solutions, we need to understand the problem. To start making a prototype, we wanted to make sure the user is going in having done the necessary legwork. So starting with the assumption that the user has identified their problem scope that they are prototyping for (perhaps by doing other ITK tools such as Community Map, Stakeholder Identification, Personas, Painstorming, Problem Framing, and Problem Statement Definition). We decided that the framing for the prototyping tool would start with a “How might we” statement that brings the user to the “Develop” portion of the double diamond where our new prototyping tool lives.
We embarked on a meta journey of documenting our design process and, in turn, designing the experience of following a design process. We started by walking through some our past prototyping efforts and identifying questions we asked and the flow of our process. We landed on some key phases:
- List Requirements (discovered through the Define and Discover phases of the double diamond)
- Vision Board (document inspiration and existing solutions that don’t quite work for your application)
- Sketch Mind Map (create small scale drawing and connected ideas sprouting from the identified requirements)
- Combine Sketches (start consolidating and combining ideas from your many sketches)
- Choose what to prototype (identify features of your sketched product that will likely need the most iteration or pose the most risk)
- Create paper/cardboard prototype (although we often use 3D printers in our work, creating something out of cardboard or paper can save time by showing what may not work at higher fidelity)
- Collect feedback and make changes (you can use your prototypes to test initial reactions of stakeholders and users and then go back in the process to iterate on suggested changes)
Moving forward we are hoping groups will test out our Prototyping process, especially on products that aren’t necessarily physical objects to test the breadth of the abilities of the tool. We feel confident that this approach works for the types of asks we see as mechanical engineers, but we would love this to help larger communities. If you try out the tool, let us know how it went and how you would improve on it!


This is very interesting! Is it possible to put a version of the diagram on this page that’s not cut off at the top and bottom? I’d like to see what the rest of the slide says!
Ah, good question! Lemme see what I can do…